
Roborock Error 4 (Cliff Sensor Issue): Fast Fixes and Diagnostic Steps
Aaron Cooper1. Introduction: Why Roborock Error 4 Happens and How to Fix It Efficiently
You press “start,” expecting a clean home… and instead, your Roborock freezes and throws Error 4. Frustrating, right? This error simply means the robot thinks it’s about to fall off a cliff—usually because its sensors are confused, not because your home suddenly grew stairs.
In most cases, the cause is surprisingly simple: dusty sensors, dark carpets, or a temporary glitch. The good news? You can usually fix it in minutes—no tools, no teardown, no stress. We’ll start with the fastest fixes (the kind you can do in under 10 minutes), then walk through deeper diagnostics only if needed.
2. Fast Fixes for Roborock Error 4 (2–10 Minute Solutions)
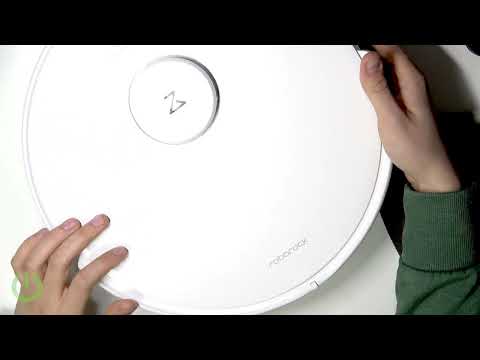
2.1 Relocate and Reset: The Quickest Way to Clear False Cliff Detection
Here’s the reality: your robot isn’t “broken”—it’s just being overly cautious. Cliff sensors use infrared (IR) light (think of them as tiny invisible flashlights pointing at the floor). If that light doesn’t bounce back properly, the robot assumes there’s a drop.
So your first move is simple:
- Pick up the robot and place it on a light-colored, flat surface—tile, hardwood, or laminate works best.
- Power it off completely.
- Wait about 30 seconds.
- Turn it back on and restart.
Why this works: it resets both the software state and the sensor’s “view” of the environment. According to official guidance, you should always ensure the robot is not on dark or shag carpet when troubleshooting Error 4 as recommended by Roborock support.
If the error disappears instantly, you’ve just confirmed it’s not a hardware issue. It’s your floor. And honestly? That’s the best-case scenario.
2.2 Clean Cliff Sensors Properly (No Water, No Tools)
Now let’s talk about the most common culprit: dirty sensors.
It doesn’t take much—fine dust, pet hair, even a thin film—to block those tiny IR “eyes.” And when that happens, your robot goes into full panic mode.
Here’s the right way to clean them:
- Use a dry microfiber cloth only
- Gently wipe each sensor window
- Cover all sensors (don’t miss the side ones)
- No water, no sprays, no chemicals
That last part matters more than you think. Liquids can leave residue or even damage the sensor coating over time. Even major cleaning guides emphasize the same principle: turn the robot over and wipe each sensor with a clean, dry cloth.
Picture this: instead of your robot hesitating, stopping, and yelling Error 4 every few minutes… it just glides. Smooth. Continuous. Effortless. That’s the difference a 2-minute clean can make.
2.3 Quick Test After Cleaning: Confirm the Problem Is Gone
You’ve reset it. You’ve cleaned it. Now comes the moment of truth.
Place the robot back on a light, flat surface and start a short cleaning run—spot clean is perfect. Watch how it behaves in the first 30–60 seconds.
| Observation | Diagnosis |
|---|---|
| Runs normally | Problem solved (likely dust or temporary misread) |
| Fails only on dark carpets | Environmental issue confirmed |
| Throws Error 4 immediately on light floors | Time to dig deeper into hardware or internal issues |
A quick trick: pay attention to when and where the error happens. Does it always stop facing the same direction? Same spot? That’s often a clue pointing to a specific sensor.
When everything works, you’ll notice it instantly. No hesitation. No random stops. Just clean floors, quietly happening in the background—exactly what you bought it for.
3. What Causes Roborock Error 4? (From Simple Dirt to Hardware Failure)
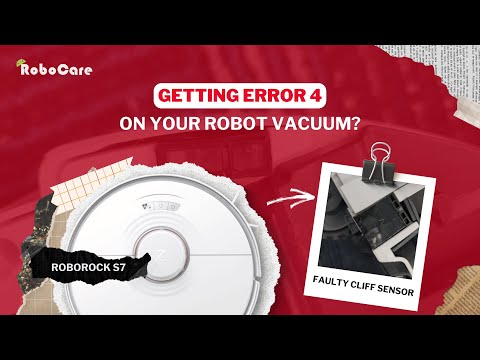
3.1 Most Common Causes: Dust, Hair, and Dark Surfaces
Let’s break it down in plain English.
Roborock’s cliff sensors are infrared-based. They send out invisible light and measure how much comes back. On a normal floor, enough light reflects back → safe. Near a drop (like stairs), the light disappears → danger.
Now here’s the catch: dark surfaces behave like a black hole for IR light. That’s why black rugs, deep patterns, or even matte finishes can trick your robot into thinking it’s about to fall. It’s not a bug—it’s physics.
Then add everyday mess:
- Fine dust coating the sensor
- Pet hair clinging to edges
- Smudges from daily use
Even a thin layer can reduce reflection enough to trigger Error 4. If your robot works perfectly on light tile but refuses to cross a black rug, you’re not dealing with a defect—you’re seeing the limits of IR sensing in action.
3.2 Less Obvious Issues: Scratched Sensors and Internal Dirt
Now let’s talk about the sneaky problems—the ones cleaning won’t fix.
Over time, those sensor windows can get scratched or cloudy. Maybe it bumped into thresholds. Maybe it’s been dragged or knocked. Even tiny abrasions can scatter the IR signal, making readings inconsistent.
Another overlooked issue? Internal dust. Not the stuff you wipe off—but the fine particles that slowly work their way inside the sensor module over months or years. Once inside, they interfere with the emitter or receiver directly.
- You clean the sensors… but see no improvement.
- Error still happens on all floor types consistently.
- The robot's behavior feels inconsistent or random.
At this point, it’s no longer a surface-level fix. The problem is deeper—literally.
3.3 Hardware Failures: Faulty Sensors, Wiring, or Mainboard
If Error 4 persists no matter what you do, it’s time to consider hardware. This is where things shift from “annoying” to “diagnosable.”
Common hardware-related causes include:
- A failed cliff sensor (one of the IR modules stops working)
- Loose or damaged internal wiring
- Rarely, a mainboard issue misreading sensor data
The key signal? Consistency across all environments. If your robot throws Error 4 immediately after starting on light floors and dark floors—everywhere—even after thorough cleaning and resets, then you’re likely dealing with a genuine component failure.
In many documented repair cases, persistent Error 4 was traced back to a single faulty sensor module, often requiring replacement to restore normal operation.
It’s not the most common outcome—but it’s the clear next step when all simple fixes fail. And the good news? By the time you reach this conclusion, you’ve ruled out all the easy stuff. No guesswork left.
4. Step-by-Step Diagnostic Flow: From Simple Checks to Advanced Testing
4.1 Surface Testing: Is It Your Floor or the Robot?
Here’s the fastest way to cut through the confusion: change nothing about the robot—only the floor.
Now move it back to the “problem zone”—that dark rug, patterned carpet, or glossy edge.
If the error suddenly comes back, you’re not dealing with a broken robot. You’re dealing with physics. Infrared sensors struggle when the floor absorbs or distorts reflected light, especially on black or high-contrast surfaces.
This controlled comparison—often described as a simple light vs dark surface test—is one of the most reliable ways to separate environment issues from hardware failure.
If it only fails in certain spots, the fix is simple: adjust your map, add no-go zones, or accept that some surfaces just aren’t robot-friendly.
If it fails everywhere? That’s when things get interesting.
4.2 Behavior Tests: Lift Test and Edge Simulation
Now we move from “where it fails” to how it behaves.
- Start with the lift test: Let the robot begin cleaning on a safe floor. Then gently raise the front slightly—just enough so the sensors no longer see the ground.
- Observe the reaction: A healthy robot reacts instantly. توقف. Maybe a slight reverse. That’s the cliff detection doing its job.
- Analyze failure: No reaction? Delayed response? Immediate Error 4? That tells you the sensors aren’t reading consistently.
Next, simulate an edge. Place a piece of dark material (like paper or a mat) next to a light floor. Let the robot approach the boundary.
What should happen? Controlled hesitation—not panic. If it throws Error 4 while still fully on a safe surface, something’s off.
These tests feel simple, but they reveal a lot. You’re essentially asking: “Do all sensors agree on what they’re seeing?”
When they don’t, Error 4 isn’t just random—it’s predictable.
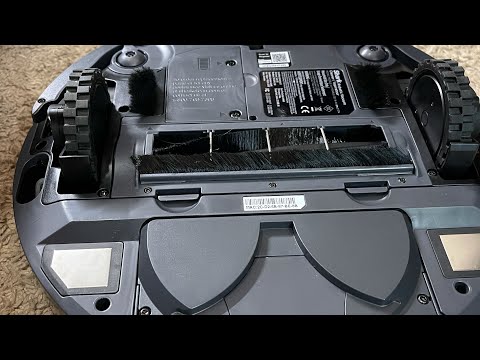
4.3 Inspection Without Disassembly: What to Look For
Before you even think about opening anything, flip the robot over and take a closer look. This is where small details matter.
Check each sensor window:
- Are they perfectly clear, or slightly cloudy?
- Any visible scratches or cracks?
- Dust packed into the edges?
Even minor surface damage can scatter infrared signals and cause inconsistent readings.
Then look beyond the sensors:
- Is the chassis slightly warped?
- Is debris lifting one wheel higher than the others?
- Is the front bumper stuck or misaligned?
This step is often skipped—but it’s where many “mystery” issues quietly reveal themselves.
4.4 When to Stop Troubleshooting and Move to Repair
There’s a point where more testing doesn’t help—it just wastes your time.
If you’ve:
- Cleaned all sensors thoroughly
- Tested on ideal light flooring
- Confirmed it’s not surface-related
- Observed consistent failure patterns
…and Error 4 still shows up immediately or everywhere…
Stop.
At this stage, you’re no longer troubleshooting—you’re dealing with hardware. Common signs you’ve reached this point:
- Error appears within seconds of starting
- Happens on every surface, no exceptions
- Behavior doesn’t change after cleaning or resets
In many real-world repair cases, persistent Error 4 like this is traced to a single failing cliff sensor module or internal contamination—something you can’t fix from the outside.
And here’s the key: knowing when to stop is what saves you hours of frustration.
5. Repair Options Explained: DIY vs Professional vs Warranty

5.1 When to Use Roborock Warranty or Official Support
If your robot is still under warranty, this is the easiest decision you’ll make: don’t open it.
Once you’ve confirmed the issue persists on light flooring and after proper cleaning, you’ve done exactly what Roborock support expects. Their own guidance is clear—clean sensors, avoid dark carpets, and if the issue continues, escalate.
Before contacting support, gather:
- Model and serial number
- Purchase details
- A clear description of the issue (where it happens, what you’ve tried)
The smoother you make this step, the faster things move. And in many cases, that means repair or replacement without touching a screwdriver.
5.2 DIY Sensor Replacement: Cost Savings vs Risk
Let’s be honest—DIY repair is tempting.
Cliff sensor parts are widely available, and based on marketplace listings, replacement sets often fall in the $10–40 range. Compared to a full repair quote, that’s a huge difference.
Pros
- Significant cost savings on parts
- Immediate fix without shipping delays
- Extended life for out-of-warranty units
Cons
- Voiding your warranty instantly
- Risk of damaging internal cables/connectors
- Requires patience and precision tools
DIY makes sense if:
- Your robot is out of warranty
- You’re comfortable with electronics
- The robot is otherwise in great condition
If not? The “cheap fix” can get expensive fast.
5.3 Professional Repair: When It’s Worth Paying for Service
Sometimes, the smartest move is also the simplest: pay someone who’s done this a hundred times.
Professional repair services typically diagnose the exact failing sensor, replace it, and clean internal components you can’t reach. Reported service costs often land around $100–150, depending on region and labor.
| Option | Estimated Cost | Best For |
|---|---|---|
| Warranty Support | $0 | Newer units under coverage |
| DIY Repair | $10–$40 | Tech-savvy owners of older units |
| Professional Service | $100–$150 | Certainty and guaranteed results |
If your robot is relatively new and otherwise working perfectly, repair can extend its life significantly. If it’s older and already showing wear (battery, brushes, noise), that same cost might be better put toward an upgrade.
6. Conclusion: The Smart Way to Handle Roborock Error 4
Roborock Error 4 feels disruptive—but in most cases, it’s surprisingly manageable.
Start simple. Move the robot to a light surface. Clean the sensors carefully. Test before assuming the worst. These quick steps solve the majority of cases without tools or stress.
If the problem persists, follow a clear path: isolate the environment, test behavior, inspect for damage. By the time you reach the end of that process, you’ll know exactly what you’re dealing with—no guesswork.
And if it turns out to be hardware? You’ve got options. Warranty, professional repair, or DIY—each with clear trade-offs.
The real win isn’t just fixing Error 4. It’s getting back to what the robot was meant to do: clean your home quietly, reliably… and give you your time back.
FAQ
Q: Why does my Roborock keep saying Error 4 on dark carpets?
A: Roborock cliff sensors use infrared light that is often absorbed by dark or black surfaces. This lack of reflected light tricks the robot into thinking it has reached a dangerous drop or cliff, triggering an automatic safety stop to prevent falling.
Q: How do I properly clean the Roborock cliff sensors?
A: Turn off the robot and flip it over. Use a clean, dry microfiber cloth to gently wipe the small rectangular sensor windows located along the edges. Avoid using water, detergents, or abrasive materials, as these can leave residue or scratch the sensor glass.
Q: Can I disable the cliff sensors to stop Error 4?
A: There is no official software setting to disable cliff sensors due to safety risks. While some users use physical covers or "tapes," this is not recommended as it prevents the robot from detecting actual stairs, leading to potential hardware damage.
Q: What should I do if Error 4 persists after cleaning?
A: If cleaning and moving the robot to a light-colored floor doesn't work, perform a hard reset. If the error remains constant across all surfaces, it likely indicates a hardware failure in a sensor module or internal wiring that requires professional repair.
Q: Does Error 4 mean my Roborock is broken?
A: Not necessarily. Most Error 4 instances are caused by environmental factors like dust accumulation on sensors or high-contrast flooring. Hardware failure is the least common cause and should only be considered after all cleaning and relocation steps have failed.