
Robot Vacuum Leaving Streaks While Mopping: Quick Fixes That Actually Work (Stop Marks Fast)
Aaron Cooper1. Introduction
You just watched your robot mop glide across the floor… only to come back an hour later and see streaks everywhere. Cloudy lines. Sticky patches. Wheel marks that somehow look worse than before. Frustrating, right?
Here’s the good news: in most cases, nothing is “broken.” Streaks usually come down to a few fixable issues—water levels, dirty mop pads, leftover debris, or even the wrong cleaning solution. Small tweaks can make a dramatic difference. In this guide, we’ll walk through quick fixes you can apply in minutes, then break down exactly why streaks happen so you can stop them for good.
2. Quick Fixes for Robot Vacuum Streaks (Try These First)
2.1 Adjust Water Levels Based on Streak Type
Not all streaks are the same—and your robot’s water setting is often the hidden culprit.
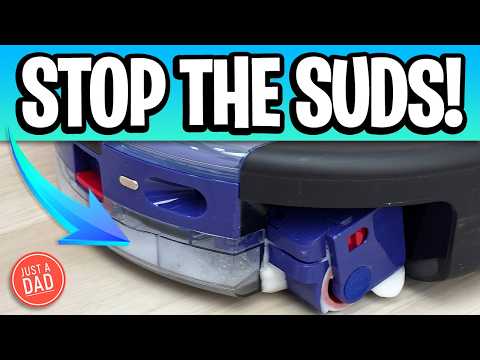
If your floor shows faint, dry drag marks (almost like the mop skipped areas), your robot is likely running too dry. This happens when the pad doesn’t stay properly damp and starts dragging instead of gliding. The fix? Increase the water level so the mop maintains consistent contact with the floor.
On the flip side, if you’re seeing wet trails, puddles, or cloudy residue, you’ve got the opposite problem. Too much water sits on the surface, dries unevenly, and leaves visible marks. In that case, dial the water level down—often to the lowest or “eco” setting.
Get this right, and everything else becomes easier. It’s the fastest win.
2.2 Clean, Replace, or Pre-Wet the Mop Pad
If your mop pad is even slightly dirty, you’re not cleaning—you’re smearing.
Think about it: that pad is picking up dust, grease, and microscopic debris. Without cleaning, it just redistributes that grime in long streaks across your floor. That’s why one of the most consistent insights across support guides and real-world feedback is simple: clean pads = clean floors.
Start by rinsing the pad under warm water until it runs clear. If it still looks gray, stiff, or greasy, it’s time to replace it. Worn pads lose their ability to absorb water evenly, which leads to patchy, streaky results.
Fresh pad. Even moisture. Instant difference.
2.3 Always Vacuum Before Mopping
This one sounds obvious—but it’s where most streak problems actually begin.
If there’s dust, hair, or crumbs on the floor, your robot doesn’t magically remove them during mopping. It turns them into mud. And then spreads that mud in neat little lines across your entire home.
That’s why the “vacuum-first rule” shows up everywhere—from manufacturer support pages to cleaning experts. If debris isn’t removed first, your mop pad gets dirty almost instantly, and streaking becomes inevitable.
So what should you do?
- Run a vacuum-only cycle first
- Or make sure your robot is set to vacuum before it starts mopping
- Empty the dustbin and clean brushes if suction seems weak
You’ll notice the difference immediately. Instead of dragging grit around, the mop is actually cleaning. No debris = no muddy streaks. Simple as that.
2.4 Eliminate Cleaning Solution Residue
Sometimes, your robot isn’t the problem at all. It’s what’s already on your floor.
If you see cloudy film, streaks that look “soapy,” or a slightly sticky feeling underfoot, there’s a good chance you’re dealing with leftover cleaning solution. Many standard floor cleaners leave behind residue—and when your robot adds water on top, it reactivates that film and spreads it around.
The fix is surprisingly simple:
- Run a full clean using plain water only
- Let the floor dry completely
- Then resume normal mopping (with approved solution if needed)
When in doubt, strip it back. Clean water. Clean slate.
3. Why Your Robot Vacuum Leaves Streaks (Root Causes Explained)
3.1 Dirty or Worn Mop Pads and Components
At the heart of most streak issues is a simple truth: your robot can’t clean with a dirty tool.
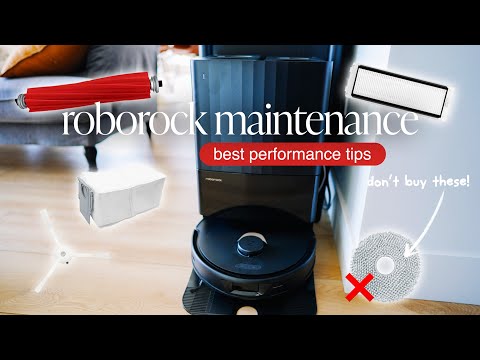
When mop pads collect dust, grease, and fine debris, they stop absorbing and start smearing. Instead of lifting dirt off the floor, they spread it in visible lines—often following the exact path of the robot. That’s why you’ll notice gray streaks or uneven cleaning patterns, especially in high-traffic areas like kitchens.
Over time, it gets worse. Pads wear down, lose thickness, and can’t hold moisture evenly. The result? Some parts of the pad stay wet while others dry out, creating inconsistent contact with the floor.
You might recognize the signs:
- Streaks that match the robot’s route
- Pads that look dull, flattened, or greasy
- Floors that look worse after cleaning than before
Once the pad fails, everything else follows. Clean pads after every run; replace them when they lose structure.
3.2 Poor Debris Pickup Before Mopping
If your robot isn’t vacuuming properly, your mopping performance doesn’t stand a chance.
Here’s what happens behind the scenes: a full dustbin, clogged filter, or tangled brush reduces suction. That means debris—dust, hair, fine grit—gets left behind. Then the mop comes along, mixes that debris with water, and spreads it across the floor.
A quick reset makes a huge difference:
- Empty the dustbin before mopping
- Clean or replace filters regularly
- Remove hair from main and side brushes
3.3 Incorrect Water Distribution or Saturation
Water is the most misunderstood part of robot mopping—and one of the biggest reasons for streaks.
| Issue | Result on Floor |
|---|---|
| Too little water | Pad drags, leaving dry, uneven lines |
| Too much water | Puddles, slow drying, and visible streak marks |
| Uneven distribution | Some parts clean well, others leave trails |
And then there’s the “startup effect.” Many robots don’t fully saturate the mop immediately, which is why streaks often appear early and improve later. In fact, multiple support sources note that performance stabilizes after the first 5–10 minutes of operation once moisture levels even out.
3.4 Floor Type and Surface Effects
Sometimes, the problem isn’t your robot—it’s your floor.
Different surfaces react to water in completely different ways, and that directly affects streak visibility:
- Glossy floors: (like polished tile or sealed hardwood) reflect light, making even tiny streaks stand out.
- Textured tiles: Water settles unevenly into grooves, drying at different speeds and leaving patchy marks.
- Wood floors: Too much moisture doesn’t just cause streaks—it can damage the floor over time.
This is why one-size-fits-all settings rarely work. The best results come from adjusting based on your actual floor: more water for rough, absorbent surfaces; less water for smooth, glossy finishes; and controlled, minimal moisture for wood.
4. Optimize Settings and Maintenance for Streak-Free Results
4.1 Smart App Settings That Reduce Streaking
If you’ve fixed the basics but still see streaks, your app settings are usually the hidden lever.
Most people set their robot once—and never touch it again. But here’s the truth: default settings are built for “average” homes. Your floors? Not average.
Then there’s cleaning pattern. Ever notice faint lines that follow the robot’s path? Switching to a “deep” or Y-pattern mode forces overlapping passes, scrubbing from multiple angles instead of just gliding over dirt. It’s slower—but dramatically more consistent.
And if streaks persist, don’t overthink it: run a second pass. Independent testing consistently shows that a second mopping pass removes leftover fine dirt and reduces streaking, especially on high-traffic floors.
More control. Better results. Less guesswork.
4.2 Maintenance Routine That Actually Prevents Streaks
Here’s the uncomfortable truth: most streak problems aren’t about technology—they’re about neglect.
It’s easy to forget that your robot is still a cleaning tool. And like any mop, if it’s dirty, it will spread dirt.
A realistic routine doesn’t need to be complicated—but it needs to be consistent.
Once a week, go a little deeper:
- Clean the main brush and side brushes (hair kills suction fast)
- Tap out or rinse the filter so airflow stays strong
- Empty and wipe the dustbin to avoid residue getting reintroduced
And once a month? Take two minutes to wipe sensors and check the wheels. It sounds minor, but dirty wheels can literally drag grime across freshly cleaned floors.
4.3 Using Advanced Features Like Auto Mop Washing & Drying
This is where modern robot mops start to feel less like gadgets—and more like actual help.
One of the biggest causes of streaks is simple: the mop gets dirty mid-run. It starts clean, but halfway through your home, it’s just pushing around diluted grime.
That’s exactly what auto-washing docks are designed to fix.
Instead of dragging a dirty pad from room to room, the robot returns to the dock, rinses the mop, and continues with a refreshed surface. The difference is subtle at first—but huge over time. Especially in larger homes.
Want to push it further? Adjust the wash frequency. If your robot allows it, shorten the interval so it cleans the mop more often during a run. This is particularly useful in kitchens or homes with pets.
Drying matters too. Damp pads left sitting develop odor and residue, which eventually transfers back onto your floors. Auto-drying keeps everything fresh—and prevents that invisible buildup that leads to streaks days later.
It’s not just convenience. It’s consistency.
5. When Streaks Mean It’s Time to Upgrade Your Robot
5.1 Limitations of Basic Flat Mop Systems
Let’s be honest—sometimes it’s not you. It’s the robot.
If you’re using a basic drag-style mop (a single flat pad that just wipes the floor), there’s a hard ceiling on performance. No amount of tweaking can fully overcome it.
System Limitations
- Relies on passive contact rather than active scrubbing.
- Pad gets dirtier with every inch of the home.
- Spreads residue from one room to the next.
The Result
- Streaks that return no matter how often you clean
- Better results at the start of a run… worse at the end
- Constant need to manually wash pads
You can improve it. But you can’t fully fix it.
5.2 Why Spinning and Roller Mops Perform Better
This is where newer designs completely change the experience.
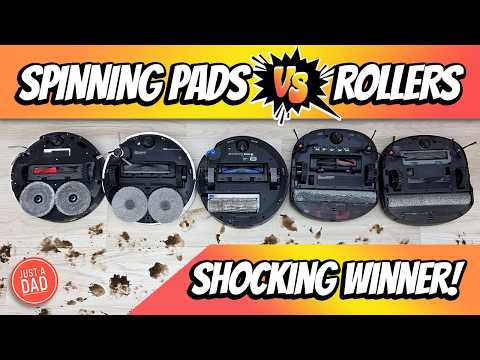
Instead of dragging a flat cloth, dual spinning pads rotate against the floor, actively scrubbing dirt away. Roller systems go even further, continuously refreshing the cleaning surface as they move.
What does that mean in real life?
- More consistent pressure.
- More even water distribution.
- Less chance of dirty water sitting on your floor and drying into streaks.
And according to comparative testing, the gap is real: flat mop systems consistently score lower in stain and streak performance than spinning or roller designs. Not because they’re broken—but because they’re fundamentally simpler.
That doesn’t mean every high-end robot is perfect. But it does explain why some users feel like they’re “fighting” their robot… while others barely think about it.
Better mechanics. Better results. Fewer compromises.
5.3 Signs Your Current Robot Has Hit Its Limits
So how do you know it’s time to stop tweaking—and start upgrading?
Look for patterns, not one-off issues.
If you’ve already:
- Cleaned or replaced the mop pads
- Adjusted water levels up and down
- Vacuumed before every mopping run
- Removed all detergent residue
…and the streaks still look the same?
That’s not a settings problem. That’s a hardware limitation.
- The mop gets dirty too quickly and isn’t cleaned mid-run
- Streaks worsen in larger spaces (pad overload)
- Results vary wildly between rooms despite identical settings
At that point, upgrading isn’t about chasing features—it’s about removing friction from your routine.
6. Conclusion
Streaks after mopping feel like a failure—but in most cases, they’re just a signal. A small imbalance in water, a dirty pad, leftover debris, or the wrong settings.
The fix is usually simple: clean your components, vacuum first, adjust water levels, and skip excess detergent. Get those right, and most streak issues disappear fast.
For long-term results, consistency matters more than complexity. A quick rinse here, a filter clean there—it all adds up to smoother, streak-free floors.
And if you’ve tried everything? That’s your cue. Not every robot is built the same.
Either way, the goal is simple: less effort, cleaner floors, and zero frustration when the job is done.
FAQ
Q: Why does my robot vacuum leave streaks after mopping?
A: Streaks are typically caused by an oversaturated mop pad, dirty components, or detergent residue on the floor. When the pad becomes too wet or soiled, it smears dirt instead of lifting it, resulting in visible lines as the water dries unevenly across the surface.
Q: Should I wet the mop pad before starting the robot?
A: Yes, pre-wetting the pad is highly recommended. Most robots take several minutes to fully saturate the cloth through their internal water systems. Starting with a damp pad ensures consistent cleaning performance and prevents dry drag marks during the first few minutes of the cleaning cycle.
Q: Can I use any cleaning solution in my robot mop?
A: No, you should only use manufacturer-approved solutions. Standard floor cleaners can be too sudsy, leaving a sticky residue that causes cloudiness and streaks. Furthermore, unapproved chemicals can damage the internal pumps and seals of your robot vacuum over time, leading to mechanical failure.
Q: How often should I replace the mop pads?
A: For optimal streak-free results, mop pads should be thoroughly rinsed after every use and replaced every 3 to 6 months. Worn-out pads lose their texture and absorbency, which prevents them from making even contact with the floor and results in patchy cleaning.
Q: Does the floor type affect mopping streaks?
A: Absolutely. Glossy floors like polished tile or dark hardwood show streaks more easily due to light reflection. For these surfaces, it is best to use a lower water flow setting and ensure the vacuum-only pass is completed first to remove all fine dust.