
Roomba False Empty Bin Error: Diagnostic Checklist and Solutions
Aaron Cooper1. Introduction: Why Your Roomba Says ‘Empty the Bin’ When It’s Already Empty
You empty the bin, snap it back in, hit CLEAN—and seconds later, the same annoying message: “Empty the bin.” Again. It feels like your robot has completely lost its mind.
The truth? This is one of the most common Roomba frustrations across i, j, s, and Combo series. And it’s rarely a “serious” failure. In most cases, it comes down to three invisible culprits: dusty sensors, restricted airflow, or a small mismatch between the bin and how the robot reads it.
The good news: you can usually fix it in minutes. This guide walks you through the fastest fixes first, then a deeper diagnostic checklist to eliminate the problem for good.
2. Quick 2-Minute Fix: The Fastest Way to Clear a False Bin Error
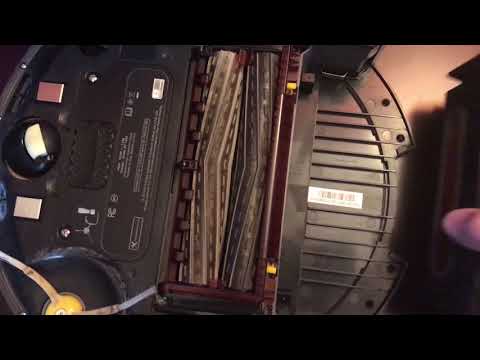
2.1 Reset the Basics: Empty, Reinsert, and Reboot
Before you start tearing things apart, start simple. Really simple.
A surprising number of false “empty bin” errors come from tiny misalignments or temporary glitches. The kind that make you question your sanity—but are easy to fix.
Here’s the fast reset sequence:
- Remove the bin completely
- Empty it fully (even if it looks empty)
- Reinsert it firmly until it clicks
- Then reboot the robot
That “click” matters more than you think. If the bin isn’t perfectly seated, the sensors can’t align properly. And when that alignment is off, your Roomba basically assumes: bin must be full.
Now add the reboot. Holding the CLEAN button forces the system to reset its internal state—clearing any temporary logic errors that may have built up during previous runs.
2.2 Wipe the Invisible Problem: Bin Sensor Windows
Here’s where things get sneaky.
Your Roomba uses optical (infrared) sensors that must “see” each other across a small gap inside the bin area. When debris blocks that invisible beam, the robot interprets it as: bin full.
Focus on two areas:
- The small sensor windows inside the robot where the bin sits
- The matching plastic windows or ports on the bin itself
Use a dry microfiber cloth only. No water. No cleaning sprays. Moisture can actually make things worse by leaving residue or damaging the sensor surface.
And don’t just wipe what’s obvious. Dust often hides inside tiny channels or notches where the sensor beam travels. That’s where most people miss it—and why the error keeps coming back.
Clean it thoroughly once, and you’ll often feel like the robot just “snapped back to reality.”
2.3 Check the Filter: The Hidden Cause of Most False Alerts
If there’s one step people skip—and regret—it’s this one.
A clogged filter doesn’t just reduce cleaning performance. It messes with how your Roomba thinks.
When airflow drops, the robot’s internal logic can interpret that as a full bin condition—even when there’s barely anything inside. That’s why many users see the error pop up mid-run, not just at startup.
In fact, a deep dive into maintenance patterns shows that a clogged filter is responsible for most recurring full‑bin errors because it disrupts airflow so dramatically.
Here’s what to do:
- Remove the filter from the bin
- Tap it firmly against a trash can
- Or use another vacuum to pull dust out of the pleats
If the filter looks gray, packed, or hasn’t been cleaned in weeks—that’s likely your culprit.
Clean airflow = accurate readings.
Blocked airflow = constant false alarms.
3. Full Diagnostic Checklist: Step-by-Step Troubleshooting Guide
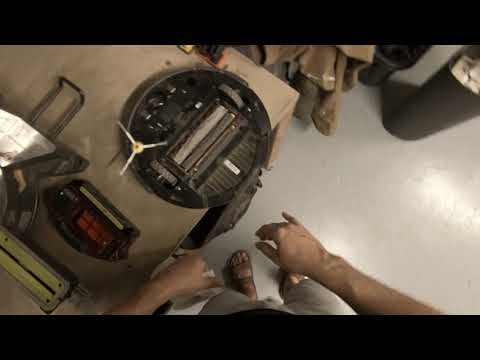
3.1 Deep Clean the Bin, Sensors, and Internal Air Channels
If the quick fixes didn’t stick, it’s time to go deeper—because the problem almost always lives inside the parts you don’t normally look at.
Start with the bin itself. Not just emptying it—actually inspecting it.
Fine dust, pet hair, and lint tend to pack into corners, narrow channels, and along the internal airflow path. Over time, this buildup doesn’t just sit there—it interferes with both airflow and sensor accuracy.
Open the bin fully and check:
- Corners and seams where debris compacts
- Narrow air channels inside the bin
- Sensor ports or plastic “tunnels” where dust hides
This is where most “mystery errors” finally make sense. The bin looks clean—but internally, it’s not.
3.2 Check Bin Fit, Type, and Alignment
Now let’s talk about something that feels trivial—but absolutely isn’t: how the bin fits.
Roombas are picky. If the bin isn’t perfectly aligned, even by a millimeter, the sensors can misfire. That’s because they rely on precise positioning to maintain that optical line-of-sight.
So don’t just insert the bin—seat it deliberately.
- Push until you feel a firm click
- Check for any looseness or wobble
- Remove and reinstall if anything feels off
If you’re using an AutoEmpty (Clean Base) model, there’s another layer: bin type.
These systems require a specific bin with an evacuation port. Using the wrong bin—even if it physically fits—can cause constant bin-related errors because the system can’t properly detect or clear debris.
Also check:
- Is the dock powered?
- Is the bin compatible with your model?
3.3 Inspect for Physical Damage or Sensor Misalignment
If cleaning and reseating didn’t solve it, it’s time to look for physical issues.
Remember: these sensors rely on a clear, uninterrupted path. Anything that blocks, bends, or misaligns that path can trigger a permanent “bin full” signal.
Carefully inspect:
- Sensor windows (look for scratches, cracks, or cloudiness)
- Plastic around the bin opening
- Any warped or bent components near the sensor area
Even a tiny crack or piece of lodged debris can distort how the sensor reads the environment. Also check for dust clumps stuck deep inside sensor channels or foreign objects (tape, hair clumps) blocking the path.
If the sensors can’t “see” each other clearly, the robot will default to assuming the bin is full—every time. This is where you separate a cleaning issue from a hardware one.
3.4 Reboot, Reset, and Test
After all that, don’t skip the final step: a controlled reset and test.
First, reboot the robot. This clears any lingering logic errors and forces the system to reassess everything from scratch.
Then run a short test:
- Place the robot in a clean, open area
- Start a quick cleaning cycle
- Watch when (or if) the error appears
| Timing of Error | Likely Culprit |
|---|---|
| Immediate error | Sensor or bin alignment issue |
| Mid-run error | Airflow or filter problem |
| After docking | AutoEmpty or communication issue |
When the robot runs smoothly without interruption, you’ll feel it instantly. No alerts. No interruptions. Just quiet, consistent cleaning—the way it was supposed to be.
4. What’s Really Causing It? Breaking Down Root Causes in Modern Roombas
4.1 Sensor Contamination vs. Airflow Restriction
At this point, you’ve cleaned, reset, and tested—but the error still shows up. So what’s actually going on?
In most cases, it comes down to two invisible forces: what your Roomba sees… and how it breathes.
Let’s start with sensors. Your robot uses optical (infrared) sensors—think of them like a tiny invisible beam crossing the bin. When dust coats those sensor windows, it’s like fog on a windshield. The beam gets distorted, and the robot assumes: bin must be full. That’s why errors often appear immediately after startup.
Now compare that to airflow issues. When the filter or internal channels are clogged, airflow drops. And here’s the twist—the robot doesn’t just measure debris, it interprets airflow behavior too. According to maintenance insights, restricted airflow is responsible for a majority of recurring bin errors because the system interprets poor suction as a full bin.
- Error appears instantly: Likely dirty sensors
- Error appears mid-run: Airflow restriction
Different cause. Same annoying message. Fix the right one, and the problem disappears for good.
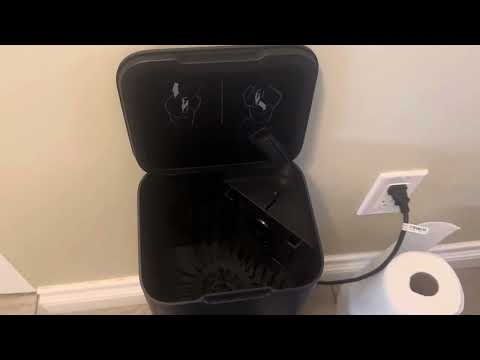
4.2 AutoEmpty Dock Problems: Bags, Seals, and Clogs
If you own a “+” model with a Clean Base, things get a little more complicated—and a lot more frustrating.
Here’s the scenario: your Roomba docks, you hear the vacuum kick on… and then—“Empty the bin.” Again.
What happened? The entire AutoEmpty system depends on a sealed airflow path. Imagine trying to drink through a straw with a tiny hole in it. Even if the suction is strong, air leaks kill performance.
Common failure points include:
- A bag that isn’t seated flat against the intake
- A bag that’s overfilled or slightly torn
- Hidden clogs inside the dock tubing or robot’s evacuation port
- A misaligned or stuck bin flap (the little valve that opens during emptying)
Clean the path. Reseat the bag. Check the seals. Because if the system can’t “breathe” end-to-end, it can’t reset itself.
4.3 Configuration Errors and Third-Party Parts Pitfalls
Sometimes, the issue isn’t dirt or dust—it’s compatibility.
Modern Roombas are surprisingly strict about what they expect to detect. The wrong bin, a slightly off-spec filter, or even a third-party dust bag can throw everything off.
Symptoms of compatibility issues include:
- “Empty the bin” even when everything looks clean
- “Bin missing” errors when it’s clearly installed
- Errors that started right after swapping parts
This is especially common with:
- Using a non-evacuation bin on AutoEmpty models
- Third-party bags that don’t seal properly
- Worn seals that no longer sit flush
"It’s tempting to save money on accessories—but here’s the tradeoff: inconsistent detection and recurring errors."
If your issues started after replacing parts, revert to known-compatible components first. It’s the fastest way to rule this out. Because sometimes, the robot isn’t broken—it’s just confused.
4.4 When It’s Software—or Something More Serious
Let’s say you’ve done everything: deep cleaned, checked airflow, verified the dock, swapped parts… and the error still won’t go away.
Occasionally, this comes down to software. A firmware glitch can cause the robot to misinterpret sensor input or fail to reset its internal state properly. That’s why a simple reboot—or in stubborn cases, a factory reset—can suddenly “fix” what looked like a hardware problem.
But if the error comes back immediately after a full reset? That’s when you start thinking hardware:
- A failing IR sensor (can’t send or receive properly)
- Internal contamination you can’t reach without disassembly
- Damaged bin components affecting alignment
At this stage, the pattern becomes clear: the robot consistently misreads a perfectly clean bin. That’s not maintenance anymore. That’s failure.
5. Preventing the Problem: Maintenance Habits That Actually Work
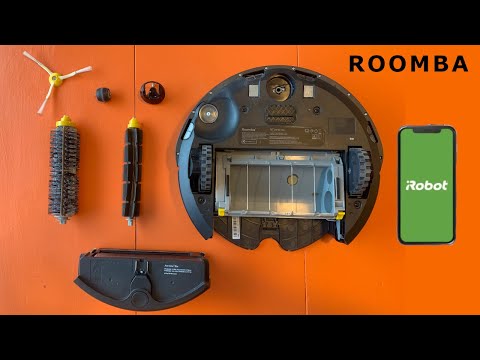
5.1 Weekly Maintenance Routine for Sensors, Filters, and Contacts
Here’s the truth most owners learn the hard way: this error is usually preventable. Not with complicated routines. Just consistent ones.
A quick weekly reset keeps everything working like it should:
- Empty the bin after every run
- Tap out the filter (more often if you have pets)
- Wipe the bin sensors and sensor ports with a dry cloth
- Clean charging contacts and visible dust buildup
Why does this matter so much? Because it doesn’t take much. A thin layer of dust on a sensor… a slightly clogged filter… that’s all it takes to trigger the error again.
Think of it like brushing your teeth. Skip it for a week, and suddenly you’re dealing with a bigger problem. Do it regularly? You never think about it.
5.2 Monthly Deep Cleaning and Moisture Prevention
Weekly maintenance keeps things stable. Monthly cleaning is what prevents those “how did it get this bad?” moments.
This is where you go deeper:
- Open the bin and clear compacted dust from corners and channels
- Inspect sensor ports for hidden buildup
- Check airflow paths inside both the robot and (if applicable) the dock
The result of moisture involves:
- Sensors get “blinded”
- Airflow gets restricted
- Errors become persistent
If your bin ever looks muddy, clumpy, or smells off—that’s your sign. Clean it thoroughly. Let it dry completely. No shortcuts.
5.3 When to Replace Parts vs. Upgrade Your Roomba
At some point, maintenance stops being the answer. So how do you know when you’ve crossed that line?
When to Maintain/Repair
- Filters are clogged but replaceable
- Bin seals are worn but swappable
- Dock bags are full or misseated
Signs for Upgrade
- Errors return immediately after deep cleaning
- The robot misreads a perfectly clean bin
- Aging sensors or internal circuit wear
Newer models tend to improve sensor placement, airflow design, and maintenance accessibility. But here’s the key: most robots don’t need replacing. They just need consistent care—until they don’t.
6. Conclusion: Fix It Fast—and Keep It From Coming Back
That “empty the bin” error feels random. It’s not. In almost every case, it comes down to three things: dirty sensors, restricted airflow, or a breakdown in the dock system.
- Quick reset.
- Sensor wipe.
- Filter cleaning.
- Airflow and dock checks.
Most problems disappear long before you reach the final steps. The real win, though, is prevention. A few minutes of weekly maintenance keeps sensors clear, airflow strong, and your robot running without interruptions.
FAQ
Q: Why does my Roomba say the bin is full when it is empty?
A: This false alert is typically triggered by dust coating the internal infrared sensor windows or a clogged filter restricting airflow. When these sensors are obscured or airflow drops, the robot's logic defaults to a full-bin error message regardless of the actual debris level.
Q: How do I clean the Roomba bin sensors properly?
A: Use a clean, dry microfiber cloth to wipe the sensor ports inside the robot's bin well and the corresponding windows on the bin itself. Avoid using water or cleaning sprays, as moisture can leave residue that further interferes with the sensors' optical beams.
Q: Can a dirty filter cause a bin full error?
A: Yes. Roomba systems monitor airflow to help determine bin status. A heavily clogged filter simulates the backpressure of a packed bin, causing the robot to trigger a false 'Empty the Bin' alert mid-run. Tapping out the filter weekly can prevent this issue.
Q: Why does the error persist after cleaning the sensors?
A: If cleaning fails, ensure the bin is clicking firmly into place. On Clean Base models, check for clogs in the evacuation path or a full bag. Persistent errors after deep cleaning may indicate a software glitch requiring a reboot or a hardware failure in the IR sensors.
Q: Should I wash my Roomba bin with water?
A: Most modern Roomba bins are washable once the filter and motor (if integrated) are removed. However, you must ensure the bin is 100% dry before reinserting it. Any remaining moisture can trap fine dust, creating a film that permanently blocks the optical sensors.