
Polaris Pool Cleaner Power Supply Not Working: Step-by-Step Troubleshooting Guide to Diagnose & Fix Fast
Aaron Cooper1. Introduction
There’s nothing more frustrating than gearing up for a crystal-clear pool… only to press the power button and get absolutely nothing. No lights. No movement. Just silence. When your Polaris pool cleaner refuses to turn on, it feels like your entire cleaning routine hits a wall.
The good news? In most cases, this isn’t a catastrophic failure. It usually comes down to something surprisingly fixable—like a dead outlet, a loose cable, or a confused control unit. This guide walks you step by step through the most common power-related issues, how to diagnose them based on symptoms, and what you can safely fix yourself before calling in professional help.
2. Start Here: Basic Power Supply Checks That Fix Most Issues
2.1 Verify Outlet Power and Control Unit Connection
Before you assume the worst, start with the simplest (and most overlooked) culprit: power supply. It sounds obvious—but this step alone resolves a huge percentage of “dead” cleaner cases.
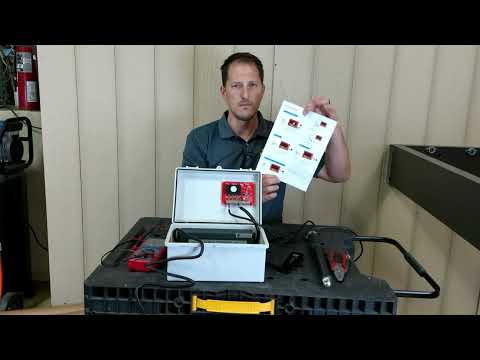
First, make sure your control unit is plugged into a working outlet. Not just any outlet—a properly functioning standard 120V outlet. If the cleaner shows no signs of life, don’t trust the outlet blindly. Test it with another device or check your breaker panel. A tripped breaker or blown fuse can silently cut power without you noticing.
Next, inspect the connection between the control unit and the cleaner. That floating cable needs to be fully seated—no gaps, no wiggle room. Even a slightly loose connection can stop power from reaching the robot.
2.2 Check Indicator Lights and What They Mean
Now let’s talk about the tiny signals your cleaner is already giving you—if you know how to read them. Those LED lights on the control unit? They’re not just decoration. They’re your first diagnostic tool.
Here’s where it gets interesting:
- If the LED is off, it can actually mean the unit is operating normally in some cases.
- If the LED is flashing, your cleaner is essentially waving a red flag saying: “Something needs attention.”
Different flashing patterns point to different issues. For example:
- A steady blink: May indicate a connection issue between the cleaner and control box.
- Repeated flashing patterns: Can signal blockages (like debris in brushes or tracks).
- No light at all: That’s when you start suspecting power delivery problems.
Think of it like your car’s dashboard. You wouldn’t ignore a blinking warning light there—same logic applies here. Reading these signals early can save you hours of guesswork later.
2.3 Inspect and Reconnect the Floating Cable Properly
If your cleaner had a “most likely to fail” component, the floating cable would be it. It lives in water, twists constantly, and connects delicate electrical signals—so yeah, it takes a beating.
- Corrosion (greenish or white buildup)
- Bent or misaligned pins
- Dirt or moisture inside the connection
Even minor corrosion can interrupt communication between the control box and the cleaner. That’s often why you’ll see error messages or flashing lights. After inspection, firmly reconnect the cable. Don’t just push it in halfway—make sure it clicks securely into place.
In fact, many communication-related errors—like error code 9 linked to cable connection faults—are resolved simply by cleaning and reseating this connection. It’s a small step. But it can bring a “dead” cleaner right back to life.
3. Match Symptoms to Root Causes: What Your Cleaner Is Telling You

3.1 No Lights or Completely Dead Unit
This is the worst-case feeling: you press the button… and absolutely nothing happens. No lights, no sound, no response. It feels final—but it usually isn’t.
Start with power flow. If the control unit isn’t receiving electricity, the cleaner won’t even get the chance to fail. That’s why dead units are most commonly linked to:
- A non-working outlet
- A tripped breaker or blown fuse
- A faulty power cord or control unit
If you’ve already confirmed the outlet works and the cable is secure, then attention shifts to the control unit itself. Internal power supply components can fail over time, especially with exposure to heat or moisture. There are also cases where water intrusion inside the control box leads to corrosion on internal boards. Once that happens, power simply can’t flow correctly.
3.2 Flashing Lights and Error Codes (Including Communication Errors)
Flashing lights are frustrating—but they’re actually helpful once you decode them. One of the most common scenarios? You see blinking LEDs or an error code, and the cleaner refuses to start or suddenly stops mid-cycle.
In many Polaris models, this points directly to connection or communication issues. A classic example is error code 9, which signals a breakdown in communication between the control box and the cleaner.
| Symptom | Potential Root Cause |
|---|---|
| Error Code 9 / Blinking | Loose or partially connected floating cable |
| Intermittent Signal | Corroded connector pins |
| No Response | Damaged cable wiring |
| Motor Strain | Debris interfering with internal components |
Sometimes the issue is as simple as the cable not being fully seated. Other times, it’s buildup on the pins that blocks signal transmission—like rust clogging a pipe.
3.3 Intermittent Power or Random Shutdowns
This is where things get frustrating. The cleaner starts… then stops. Works one day… refuses the next. No clear pattern. Intermittent issues are almost always tied to unstable electrical connections.
From real-world repair breakdowns, the usual suspects include:
- Loose internal wires inside the connector
- Slightly detached wire terminals at the pin connection
- Oxidation (a thin layer of corrosion) disrupting conductivity
- Overheating components inside the control unit
In some cases, users have opened the cable connector only to find a wire barely hanging on—tight enough to work sometimes, loose enough to fail randomly. Think of it like a flickering light switch. The connection isn’t fully broken—it’s just unreliable.
4. Fix It Yourself: Practical Repairs You Can Try Safely
4.1 Reset the Control Unit and Restore Operation
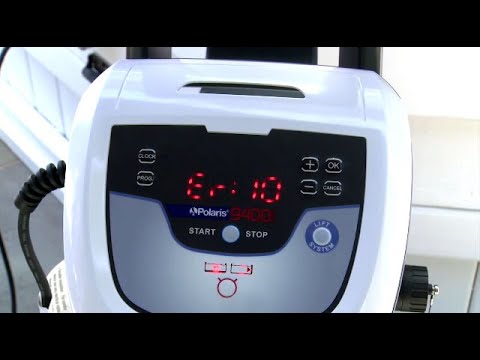
Before you grab tools or start pricing replacement parts, try this first. Seriously. A simple reset fixes more “dead” Polaris cleaners than most people expect.
When the control unit freezes or stops responding, it’s often not a hardware failure—it’s a temporary glitch. Like your phone locking up, the system just needs a clean reboot.
Once powered back on, restart the cleaning cycle and select a program.
If your buttons weren’t responding or the cleaner refused to start, this step alone can bring everything back to life. According to official troubleshooting guidance, a quick power cycle is the recommended first fix when the control box becomes unresponsive by disconnecting and reconnecting the power supply.
It’s fast. No tools. No risk. And when it works, it feels like magic.
4.2 Clean Corroded Pins and Electrical Contacts
Now let’s talk about one of the most underestimated pool-killer problems: corrosion.
Your cleaner lives in a wet, chemical-heavy environment. Over time, even tiny amounts of oxidation on connector pins can block electrical signals. The result? Flashing errors, failed startups, or random shutdowns.
The fix is surprisingly simple. Disconnect the floating cable and inspect the pins closely. If you see discoloration or buildup, gently clean them. Many repair walkthroughs show that lightly using fine sandpaper or a small brush can restore proper contact without damaging the pins.
Think of it like cleaning battery terminals—once that clean metal connection is restored, power flows smoothly again.
Just don’t go aggressive. You’re not sanding a deck. Gentle, precise cleaning is enough.
And when you plug everything back in? That previously “dead” connection often works like new.
4.3 Check for Loose Internal Wires and Cable Damage
This is where things get a little more hands-on—but also where some of the most satisfying fixes happen.
If your cleaner has intermittent power or keeps disconnecting, there’s a good chance the issue is hiding inside the cable connection itself. Not outside. Inside.
In multiple repair cases, the root cause came down to something almost laughably simple: a loose wire inside the connector. Tight enough to work sometimes. Loose enough to fail when it moves.
By carefully opening the cable connector (only if you’re comfortable doing so), you can inspect where wires attach to the pins. Look for:
- Wires slipping out of terminals
- Loose screws holding wire ends
- Signs of oxidation on exposed wire
In some cases, tightening a tiny internal screw or reseating a wire completely restores power.
But here’s the line: if you see severe damage, cracked insulation, or heavy corrosion—stop. That’s no longer a DIY fix.
Still, when it is just a loose connection? It’s one of those rare repairs where a five-minute fix saves you hundreds.
5. When to Repair vs Replace: Avoid Costly Mistakes
5.1 Signs the Power Supply or Control Board Has Failed
There’s a point where troubleshooting stops being productive—and starts wasting your time.
If you’ve checked the outlet, reset the unit, cleaned the pins, and verified the cable… and still nothing works, you’re likely dealing with internal failure.
The biggest red flags:
- No response at all after confirmed power input
- Visible corrosion inside the control unit
- Water intrusion (a very common silent killer)
- Burnt components or persistent shutdowns
Water damage is especially brutal. Once moisture gets inside the control box, it can corrode circuits and break power delivery entirely. At that stage, the issue isn’t a connection problem—it’s a component failure.
And unlike cleaning a pin or tightening a wire, internal board repair isn’t practical for most homeowners.
That’s your signal: stop troubleshooting externally. The problem is deeper.
5.2 Real Repair Costs vs Replacement Considerations
Here’s where things get real.
It’s tempting to keep fixing—replace a cable here, try a new part there. But costs can stack fast. There are real-world cases where a Polaris unit needed a new control board, cable, and motor—totaling close to $1000 in parts.
And here’s the painful part: even replacing one component (like a floating cable) doesn’t guarantee it solves the problem.
Pros of Repairing
- Lower immediate cost for minor fixes
- Environmentally friendly (less waste)
- Extends life of a high-end machine
Cons of Repairing
- Costs can approach $1000 for major parts
- No guarantee of fixing the root cause
- Older units may suffer "cascading failures"
A practical rule: if repair costs start approaching a significant portion of a new cleaner, it’s time to rethink. Not just financially—but in reliability. Older units with multiple failing components tend to keep failing.
It’s like patching an old car. Fix one thing, something else breaks next month.
5.3 When to Contact Polaris Support or a Service Center
There’s zero shame in calling in backup—especially when electricity and water are involved.
If your issue points to:
- Internal power supply failure
- Transformer or board issues
- Persistent error codes after all fixes
…it’s time to contact Polaris support or an authorized service center. They have access to diagnostic tools and model-specific knowledge that goes beyond basic troubleshooting.
The goal isn’t just to fix the problem—it’s to fix it once, correctly, without creating a bigger one.
6. Conclusion: A Smarter Way to Troubleshoot Pool Cleaner Power Issues
A Polaris pool cleaner that won’t power on feels like a major failure—but most of the time, it isn’t. It’s a chain of small, fixable issues: a loose cable, a dirty connector, a confused control unit.
Start simple. Always. Check power. Read the lights. Reset the system. Then move deeper—connections, corrosion, and wiring.
The key is following the signal, not guessing.
Because once you understand what your cleaner is trying to tell you, troubleshooting stops being frustrating—and starts being surprisingly straightforward.
And the payoff? Huge.
A machine that looked completely dead… quietly comes back to life. Your pool stays clean. Your weekends stay yours. That’s the real win.
FAQ
Q: Why is the LED light on my Polaris control unit flashing?
A: A flashing LED typically indicates a communication error or a physical blockage. Based on aggregated technical data, this is frequently caused by a loose floating cable connection or debris trapped in the brushes or tracks, preventing the unit from completing its startup cycle.
Q: How do I reset my Polaris pool cleaner power supply?
A: To perform a hard reset, disconnect the power supply from the outlet for at least 10 seconds. This allows internal capacitors to discharge fully. Reconnect the plug and restart the cleaning cycle to clear temporary software glitches or unresponsive control box states.
Q: What does error code 9 mean on a Polaris pool cleaner?
A: Error code 9 specifically points to a communication failure between the control box and the cleaner. Our analysis of technical specs suggests checking for corroded pins on the floating cable connector or ensuring the cable is seated firmly in the socket.
Q: Can I fix a Polaris cleaner that has no lights at all?
A: Yes, this often stems from external power issues. First, verify the GFCI outlet hasn't tripped and the circuit breaker is on. If the outlet is functional, inspect the power cord and control unit for signs of water intrusion or internal fuse failure.
Q: How can I remove corrosion from the cable connector pins?
A: Based on common maintenance practices, you can gently clean the pins using a small brush or fine-grit sandpaper to remove oxidation. Restoring a clean metal-to-metal contact is essential for maintaining a stable electrical connection in chemically treated pool environments.