
Polaris VRX iQ+ Error Code 10: Meaning, Common Causes & Step-by-Step Fix Guide
Aaron Cooper1. Introduction
You power up your Polaris VRX iQ+, expecting that satisfying hum as it glides across your pool… and instead, you get slapped with Error Code 10. Just like that, your “set-it-and-forget-it” cleaning routine turns into troubleshooting frustration.
The good news? This error usually isn’t a total system failure. In most cases, it’s your robot’s way of saying something’s interrupting the connection between its brain and body. In this guide, we’ll break down exactly what Error 10 means, what typically causes it, and how to fix it—from quick 2-minute checks to deeper electrical issues—so you can get back to a clean pool without wasting time or money.
2. What Does Polaris VRX iQ+ Error Code 10 Actually Mean?
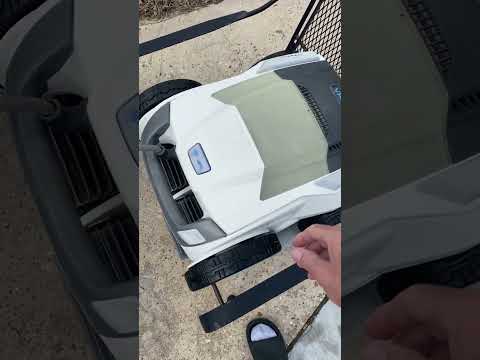
2.1 A Communication Breakdown Between Control Box and Cleaner
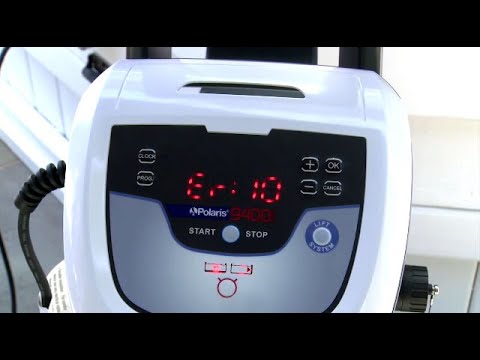
At its core, Error Code 10 is not about poor cleaning performance—it’s about silence. Specifically, your robot and its control box have stopped “talking” to each other.
According to Polaris guidance, this error points to a loss of communication and power through the floating cable. That floating cable isn’t just a power cord—it’s the robot’s lifeline. It delivers electricity and carries signals telling the cleaner where to go, when to climb, and how to operate.
So when that connection is interrupted—even briefly—the system shuts things down as a safety measure. The frustrating part? The robot itself might be perfectly fine mechanically. The brushes, wheels, and motor could all be ready to go—but without that stable connection, it simply won’t run.
2.2 Why This Error Is Often Misleading
Here’s where things get tricky—and honestly, a bit maddening. Error Code 10 looks like a simple, generic warning. But in reality, it’s more like a catch-all alert that can be triggered by multiple underlying issues. Loose plug? Same error. Corroded pins? Same error. Internal water damage? Still Error 10.
That’s why so many owners fall into a loop: reset, retry, repeat… and nothing changes. Across user reports and repair breakdowns, one pattern shows up again and again: the error doesn’t tell you what failed—only that something in the communication chain did.
That chain includes:
- The control box connection
- The floating cable (including internal wires)
- The swivel or connector joints
- Internal electronics inside the robot
In other words, you’re not diagnosing a single component—you’re tracing an entire system. And that’s why this error feels so frustrating. It’s not just one problem. It’s a mystery with multiple suspects.
3. Common Causes of Error Code 10 (From Simple to Complex)
3.1 Loose Connections and Dirty Connector Pins
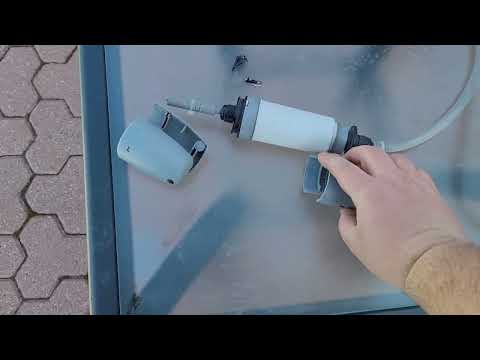
Let’s start with the easiest—and most common—culprit. Over time, the connection between the floating cable and control box can loosen slightly. Maybe it wasn’t fully seated. Maybe it got nudged. Or maybe microscopic corrosion has built up on the pins.
The result? An unstable electrical connection that randomly drops signal. This is why many fixes start surprisingly simple. Tightening the plug, reseating the cable, or cleaning the pins can instantly restore communication.
Some repair walkthroughs even show that gently cleaning pins with fine sandpaper or contact cleaner can remove oxidation that’s invisible to the eye but disruptive to the signal. Low effort. High success rate. Always check this first.
3.2 Floating Cable Damage and Internal Wire Breaks
Now we move into the sneaky stuff. Your floating cable might look perfectly fine on the outside—no cuts, no fraying—but still be broken inside. Why? Repeated bending.
Every time your robot turns, climbs a wall, or gets pulled out of the pool, stress concentrates at specific points—especially near:
- The entry point into the cleaner
- The connector near the control box
- Any tight bend or “elbow” section
Over time, internal wires can crack or partially break, causing inconsistent electrical flow. What makes this especially frustrating is that standard visual inspection won’t catch it. Even basic continuity tests can pass if the wire only fails under movement. Real-world teardown examples show that these breaks often occur right where the cable enters the robot housing—the exact spot that flexes the most during operation.
3.3 Swivel, Connector, and Hidden Corrosion Issues
That rotating swivel in your cable—the part designed to prevent tangling—can actually become a hidden failure point. Inside that small component are electrical contacts that maintain connection while the cable twists. But here’s the problem: it’s also a place where water can slowly creep in.
Once moisture gets inside, corrosion begins. And corrosion doesn’t just weaken the connection—it disrupts it entirely. In detailed repair breakdowns, opening the swivel has revealed:
- Visible corrosion on internal contact rings
- Moisture trapped inside long after use
- Degraded conductivity between contact points
From the outside, everything looks normal. But inside? The signal path is breaking down. This is one of those “invisible failures” that can waste hours of troubleshooting if you don’t know where to look.
3.4 Motor Block or Water Damage Inside the Unit
If you’ve checked everything externally and Error 10 still won’t go away… this is where things get serious. Internal water intrusion can damage the robot’s electronics—especially the motor control board. And once that happens, the communication system itself starts failing.
Documented Internal Issues
- Moisture inside the motor housing
- Burnt or damaged circuit board components
- Failed capacitors or electrical pathways
Reality Check
- High repair costs for motor blocks
- Requires professional diagnostic tools
- Often leads to full unit replacement
And here’s the painful truth: at this point, you’re no longer dealing with a simple fix. Even if the robot powers on briefly, damaged electronics can prevent stable communication—triggering Error 10 over and over again. This is also where repair costs start climbing fast, since replacing internal components like the motor block or control board can be expensive.
4. Step-by-Step Troubleshooting Guide to Fix Error Code 10
4.1 Start Simple: Reset and Reconnect
Before you grab tools or assume the worst, start here—because sometimes the fix really is this simple.
Error Code 10 often appears after a brief communication glitch. A power interruption, a slightly loose cable, or even a minor voltage inconsistency can break the connection between the control box and the cleaner.
It sounds almost too easy—but this step re-establishes the communication handshake between the control unit and the robot. If the issue was temporary, this alone can clear it.
Next, firmly reseat the floating cable at the control box. Don’t just “check” it—push it in until it’s fully secure. Even a barely loose connection can interrupt both power and data flow.
Think of it like plugging in your phone charger halfway. It might work… until it doesn’t.
If your cleaner springs back to life after this step, you just saved yourself a lot of time. If not, keep going.
4.2 Inspect and Clean Electrical Contacts
Now we get a bit more hands-on—and this is where many hidden issues reveal themselves.
Over time, connector pins can develop oxidation or collect debris. You might not see it clearly, but your robot definitely feels it. That thin layer of corrosion is enough to weaken or completely block electrical contact.
Carefully inspect both ends of the connection:
- Inside the control box port
- On the cable connector pins
Look for discoloration, residue, or bent pins.
Cleaning matters here. Lightly using fine sandpaper or a proper contact cleaner can restore conductivity. Some repair walkthroughs show that gently rolling sandpaper inside the pin slots is far more effective than scraping from the outside.
This is one of those moments where a 10-minute fix can feel like magic.
4.3 Check Cable Integrity and Stress نقاط
Here’s where things get frustrating—because the problem might be invisible.
Your cable can fail internally while looking perfectly fine outside. No cuts. No wear. Nothing obvious. Yet inside, wires may be partially broken.
Focus on high-stress points:
- Where the cable enters the robot housing
- The elbow or strain relief sections
- Near the control box connector
- Around the swivel
These areas flex constantly during operation.
A common real-world pattern? The robot starts, runs for a few seconds… then stops with Error 10. That’s often a cable that loses connection when it bends.
In teardown examples, internal cracks were found exactly at these stress points—even though the outer sheath looked untouched.
If you suspect this, gently move the cable while the unit is running (safely). If behavior changes, you’ve likely found the weak spot.
This is also where things get real: replacing the cable isn’t cheap, and DIY repairs can be tricky if the damage is near sealed sections.
4.4 When to Escalate: Support or Internal Repairs
If you’ve gone through all the steps above and Error 10 is still staring back at you… it’s time to consider deeper issues.
At this stage, the problem is likely internal:
- Motor control block issues
- Water intrusion
- Damaged circuit board components
And here’s the hard truth—these aren’t quick fixes.
Some documented cases show water inside the unit leading to failed electronics and persistent errors, even after replacing individual parts. Others replaced major components only to see the error return days later.
That’s why official guidance recommends escalating after basic troubleshooting. If steps like reset, reconnection, and pin cleaning don’t work, the next move is professional diagnostics or part replacement.
This is the tipping point.
You’re no longer fixing a connection—you’re potentially rebuilding a system.
5. Repair vs Replacement: Is Fixing Error Code 10 Worth It?

5.1 Quick DIY Fixes That Often Work
Let’s start with the good news—some Error 10 fixes are surprisingly easy.
Across real-world cases, a huge portion of issues come down to:
- Loose internal wires
- Dirty or oxidized connectors
- Slightly unseated plugs
And the fix? Sometimes it takes less than 10 minutes.
There are multiple examples where simply tightening a wire inside the connector or cleaning the pins completely restored the robot. No parts. No cost. Just attention to detail.
That’s why it’s critical not to jump straight into expensive replacements.
If your cleaner briefly runs, then stops… or behaves inconsistently… you’re likely dealing with a connection issue—not a catastrophic failure.
5.2 Expensive Parts: Cable, Swivel, and Motor Block
Now for the reality check.
If the issue goes beyond simple fixes, costs rise quickly.
The floating cable alone can run over $350+ for a replacement, and that’s just one component. The motor control block—especially if water damage is involved—can be even more expensive.
And here’s what makes it worse: these parts are interconnected.
You might replace the cable… only to discover the issue was actually inside the motor. Or fix the motor… and still have a faulty swivel causing intermittent communication.
That trial-and-error process? It adds up fast.
This is where many owners hit frustration. You’re investing significant money without a guaranteed fix.
At this point, every decision should be weighed carefully.
5.3 Realistic Lifespan and When to Replace
Here’s the uncomfortable truth most people don’t hear upfront.
Based on aggregated user experiences, robotic pool cleaners like the Polaris VRX iQ+ often run into major issues around the 3–5 year mark. Not always—but often enough to notice a pattern.
And Error 10? It tends to show up right around that window.
So when you’re facing:
Critical Warning Signs
- Expensive parts
- Internal electrical damage
- Repeated failures
You have to ask a simple question: is it worth it?
If your unit is relatively new, repair makes sense. But if it’s already a few years in and requires major components, replacement can actually be the more rational choice.
Because at some point, you’re not fixing a machine anymore.
You’re chasing reliability.
6. Conclusion
Error Code 10 on the Polaris VRX iQ+ feels like a nightmare—but in many cases, it’s just a broken connection, not a broken robot.
Start simple. Reset the system. Reseat the cable. Clean the pins. These small steps solve a surprising number of cases.
If that doesn’t work, move methodically—check the cable, inspect stress points, and consider hidden issues like corrosion or internal wear.
And if you reach the point of expensive repairs? Pause and evaluate. Sometimes fixing it makes sense. Sometimes replacing it saves you more time, money, and frustration in the long run.
Either way, the key is this: don’t guess—diagnose step by step.
FAQ
Q: What does Error Code 10 mean on a Polaris VRX iQ+?
A: Error Code 10 indicates a communication failure between the control box and the cleaner. Based on technical specifications, this occurs when the signal or power flow through the floating cable is interrupted, often due to loose connections, oxidized pins, or internal wiring damage.
Q: How do I perform a basic reset for Error Code 10?
A: Start by disconnecting the power supply entirely. Unplug the floating cable from the control box, wait approximately 60 seconds, and then firmly reseat the cable. Power the unit back on to re-establish the electronic handshake between the internal components and the controller.
Q: Can a dirty connector cause Error 10?
A: Yes, oxidation or debris on the metal connector pins can disrupt the data signal. Data-driven troubleshooting suggests cleaning the pins with a specialized contact cleaner or fine sandpaper to restore conductivity, which frequently resolves intermittent Error 10 issues without replacing parts.
Q: Why does my robot start and then stop with Error 10?
A: This behavior typically suggests an intermittent connection. As the robot moves or climbs, internal breaks in the floating cable—often near the strain relief points—can momentarily disconnect. This brief power or signal drop triggers the system to shut down for safety.
Q: Is Error Code 10 always a sign of a broken motor?
A: Not necessarily. While internal motor block damage or water intrusion can trigger this code, it is more commonly caused by external cable issues. It is recommended to exhaust all cable and connector troubleshooting steps before assuming a catastrophic motor failure has occurred.