
Battery Degradation in Robot Mowers: Expected Lifespan, Warning Signs & When to Replace
Aaron Cooper1. Introduction
Your robot mower might look like a quiet little helper gliding across your lawn—but its battery is the real engine behind everything. When that battery starts to fade, you don’t just lose runtime… you lose coverage, efficiency, and eventually your patience.
In this guide, we’ll break down what really happens as robot mower batteries age, how long they typically last, the warning signs you shouldn’t ignore, and exactly when—and how—to replace them without wasting money or time.
2. How Robot Mower Batteries Degrade (and How Long They Really Last)
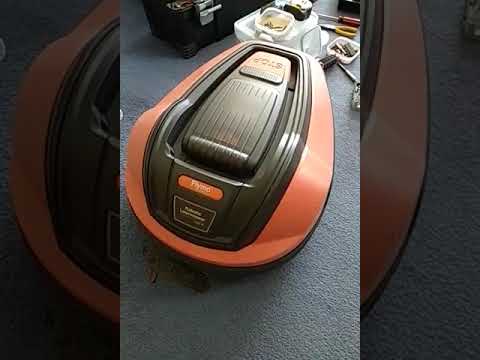
2.1 Typical Lifespan: Why Most Robot Mower Batteries Last 2–5 Years
Let’s start with the number everyone wants to know: how long does a robot mower battery actually last?
Across manufacturers and real-world usage, the consensus is surprisingly consistent—most lithium-ion (Li-ion) batteries in robot mowers last about 2 to 5 years, with some stretching longer under ideal conditions. In fact, a deeper look at industry data shows that most Li-ion mower batteries are rated for roughly 500–800 charge cycles, which translates directly into those real-world timelines.
Why Li-ion? Simple. It’s the sweet spot between power, weight, and durability. Compared to older NiMH or lead-acid batteries, Li-ion packs are lighter, more energy-dense, and better suited for daily automated mowing.
There are exceptions:
- LiFePO₄ (lithium iron phosphate) batteries can last significantly longer, thanks to higher cycle counts and better thermal stability.
- Older chemistries like NiMH or lead-acid tend to wear out faster and are rarely used in modern robotic mowers.
But here’s the catch: lifespan isn’t just about chemistry. It’s about how hard your mower works. A small, flat lawn? You might stretch beyond 5 years. A large, hilly yard with thick grass? You could hit that replacement window much sooner.
Same battery. Completely different reality.
2.2 Charge Cycles Explained: The Real Metric Behind Battery Aging
Here’s where things get interesting—and where most people misunderstand battery life.
A “charge cycle” doesn’t mean plugging it in once. It means using 100% of the battery’s capacity, whether that happens in one long mowing session or several shorter ones combined.
Now imagine two homeowners:
- Small lawn owner: The mower trims lightly every few days, barely draining the battery each run. Fewer cycles per year. Slower aging.
- Large lawn owner: The mower runs long sessions daily, often draining deeply before returning to dock. More cycles. Faster wear.
Same machine. Same battery. Totally different lifespan. This is why some people swear their battery lasted “forever,” while others are shopping for replacements after just a couple of seasons.
It’s not luck. It’s cycle math.
2.3 What Speeds Up Degradation: Lawn Size, Terrain, and Climate
Now let’s talk about what really kills batteries faster—because it’s rarely just time.
First, lawn size and workload. If your mower is constantly running near its limits just to keep up, it’s essentially sprinting a marathon every day. More runtime means more cycles, and more cycles mean faster aging.
Then there’s terrain:
- Slopes force motors to work harder.
- Uneven ground increases resistance.
- Thick or overgrown grass demands more cutting power.
All of that translates into higher energy draw—and more stress on the battery.
And then comes the silent killer: temperature.
- Heat accelerates chemical aging inside the battery. A mower baking in direct sun while sitting fully charged? That’s a worst-case scenario.
- Cold reduces available capacity and can even damage cells if charging occurs in freezing conditions.
This is why manufacturers recommend shaded charging stations and proper winter storage. Ignore that, and you’re essentially shaving months—or even years—off your battery’s life.
2.4 What “End-of-Life” Looks Like in Daily Use
Battery degradation doesn’t happen overnight. It creeps in slowly… until one day, you realize your mower just isn’t keeping up anymore.
At first, it’s subtle:
- Slightly shorter mowing sessions
- A few more trips back to the charging dock
Then it becomes obvious:
- The mower can’t finish the lawn in one cycle anymore
- It docks more frequently than it used to
- Charging seems to take longer—or feels less effective
Eventually, you may even see it stop mid-lawn with an empty battery, even under normal conditions.
Most manufacturers consider a battery “end-of-life” when capacity drops to around 70–80% of its original level. That might sound acceptable on paper—but in practice, it’s the tipping point where performance frustration begins.
| Timeframe | Performance Expectation |
|---|---|
| Year 1 | Smooth, effortless mowing. |
| Year 3 | You start noticing changes. |
| Year 5 | It’s no longer reliable. |
That’s the moment when your robot stops feeling like a time-saving upgrade… and starts feeling like another chore.
3. When and How to Replace a Robot Mower Battery
3.1 Clear Signs It’s Time for a Replacement
There’s a difference between a bad mowing day… and a battery that’s genuinely wearing out.
A single short run doesn’t mean much. But when patterns start repeating, that’s your signal.
The most obvious red flag? Shrinking runtime. If your mower used to handle your lawn in one smooth session but now needs multiple recharges to finish, the battery is no longer holding the same energy.
Then comes the behavior shift:
- It returns to the dock more frequently, even under similar grass conditions
- It may take longer to charge, or oddly, charge quickly but deliver very little runtime afterward
- In some cases, it simply stops mid-job without completing the mowing cycle
You might also see system warnings or battery-related error messages, depending on your model. The key here isn’t one-off glitches—it’s consistency. When the same symptoms show up week after week, you’re no longer dealing with lawn conditions. You’re dealing with battery degradation.
3.2 Replacement Timing: Proactive vs Reactive Approach
So when should you actually replace the battery? You’ve got two approaches—and they lead to very different experiences.
Proactive Approach
- Planning ahead (Year 3 or 4).
- Keeps everything running smoothly.
- Avoids chaos during peak season.
Reactive Approach
- Wait until the battery fails.
- Failure often happens at the worst possible moment.
- Leaves patches and incomplete lawn care.
Think of it like swapping tires before a road trip—not after they blow out on the highway. If your mower still works but struggles? That’s your window. Replace early, and you avoid the chaos later.
3.3 Compatibility Checklist: Voltage, Capacity, and Battery Type
Here’s where many people make a costly mistake: assuming all batteries are interchangeable. They’re not.
When choosing a replacement, you need to match several key factors:
- Voltage (V): This must match exactly. Even small deviations can cause system errors—or worse, damage the mower.
- Battery chemistry: Stick with the original type (usually Li-ion). Switching to a different chemistry without proper support can create charging issues.
- Capacity (Ah or Wh): Slightly higher capacity can extend runtime, but only if the mower supports it. Lower capacity? That’s a downgrade you’ll feel immediately.
- Connector and form factor: If it doesn’t physically fit or connect properly, it simply won’t work.
Bottom line: this isn’t the place to “guess and hope.” Match the specs. Every time.
3.4 DIY vs Professional Replacement: What to Expect
Good news: in many cases, replacing a robot mower battery is surprisingly straightforward.
For a lot of consumer models, it’s closer to swapping a laptop battery than repairing a car:
- Open the housing
- Disconnect the old pack
- Plug in the new one
- Reassemble and charge
Some manufacturers even design batteries as user-replaceable parts, recognizing that this is a normal part of ownership. But—and this matters—DIY isn’t always the best choice.
- The mower requires full disassembly to access the battery
- There are waterproof seals or gaskets that must be properly reinstalled
- You’re seeing other issues (charging errors, connector damage, inconsistent behavior)
So ask yourself: Is it a simple swap—or a deeper issue? If it’s the former, DIY can save time and money. If it’s the latter, a professional check can save you from replacing a perfectly good battery… and still having the same problem.
4. How to Extend Robot Mower Battery Life (and Delay Replacement)

4.1 Smarter Mowing Schedules: Less Stress, Better Longevity
Here’s the irony: running your mower more often can actually make your battery last longer.
Sounds backward, right?
But think about what happens when you let the grass grow too long. The mower suddenly has to fight through thick, dense blades, pulling more power, generating more heat, and draining the battery deeper in a single run. That’s like going from a light jog to a full sprint—every time.
Now compare that to frequent, light trimming. The mower glides. The load stays low. Each run uses less energy.
And here’s where many people unknowingly shorten battery life: overscheduling.
If your mower is running all day “just in case,” you’re burning through charge cycles faster than necessary. More cycles = faster aging.
The sweet spot? Consistent, efficient mowing—without overdoing it. Your lawn stays perfect. Your battery lasts longer. Win-win.
4.2 Charging Habits That Protect Lithium Batteries
Let’s talk about something most people never think about: how your mower charges.
Because this is where a lot of hidden damage happens.
Lithium-ion batteries (the standard in modern robot mowers) don’t like extremes. Not too empty. Not too full. That sweet spot? Roughly 20% to 80% charge for optimal longevity.
Now, you don’t need to babysit your mower—that’s the whole point of automation. Most models are smart enough to return to the dock at around 15–20% remaining. That’s intentional. It’s protecting the battery from deep discharge.
So what does “good behavior” look like in real life?
- Let the mower auto-dock naturally—don’t force it to run until it dies
- Avoid long idle periods at 0% or fully drained
- Keep the charging station in a cool, shaded area
You don’t need perfection. Just avoid extremes. Because batteries don’t fail suddenly—they wear out from small habits repeated over time.
4.3 Temperature, Storage, and Seasonal Care
If charge cycles are the visible cause of battery wear… temperature is the silent one.
Heat, in particular, is brutal. Leaving your mower baking in direct summer sun—fully charged on the dock—is like leaving your phone on a car dashboard all day. It doesn’t fail instantly. But inside, chemical aging is accelerating.
That’s why manufacturers consistently recommend placing the charging station in a shaded or cooler location. Even a simple cover or “robot garage” can make a noticeable difference.
Cold brings a different problem. At low temperatures, batteries temporarily lose capacity. But the real danger is charging in freezing conditions, which can damage the cells permanently.
Proper storage is simple but critical:
- Store in a cool, dry, frost-free place
- Avoid letting the battery sit completely empty
- Follow your manufacturer’s guidance (some recommend charging before storage)
Do this right, and you can literally “add years” to your battery’s usable life.
4.4 Reduce Battery Load Through Simple Maintenance
What if your battery isn’t the problem… but your mower is making it work too hard?
Imagine trying to run in muddy shoes while carrying extra weight. That’s exactly what happens when your mower is dirty or poorly maintained.
- Dull blades tear grass instead of slicing it cleanly → more resistance
- Clogged decks create drag → higher power consumption
- Dirty wheels or poor traction force the motor to work harder
All of that translates into one thing: more energy per minute of mowing. And that means shorter runtime per charge, more frequent docking, and faster battery wear over time.
The fix is surprisingly simple:
- Keep blades sharp
- Clean the deck and wheels regularly
- Remove debris buildup after mowing
Less resistance = less power draw = fewer cycles. And fewer cycles? That’s the secret to a longer-lasting battery.
5. Battery Replacement Cost vs. New Mower: What Makes Sense?

5.1 Typical Battery Costs Across Different Robot Mower Segments
Let’s address the concern most people have the moment their battery starts failing: “Is this going to be expensive?”
Across the market, replacement batteries fall into fairly predictable ranges depending on mower size and segment:
| Segment | Typical Battery Cost | What It Means |
|---|---|---|
| Entry-level models | $80–$150 | Budget-friendly, often simpler packs |
| Mid-range residential | $130–$250 | Most common category |
| Premium / large lawn | $200–$400+ | Larger capacity, more complex systems |
Compared to the price of a full robot mower, the battery is usually only a small fraction of the total cost. Even in premium models, you’re often looking at under 20% of the price of a new machine.
5.2 When Replacing the Battery Is the Smart Financial Move
In many cases, replacing the battery is the easiest, smartest decision you can make. Here’s the scenario where it makes the most sense:
Replacement is Ideal if:
- Your mower still navigates perfectly.
- The cutting system works.
- The app connects and software is stable.
- The only issue is runtime.
Replacing the battery delivers the best cost-per-year value. It’s the difference between a quick tune-up… and buying a whole new car because the tires wore out.
5.3 When It’s Better to Upgrade to a New Robot Mower
Sometimes, battery replacement is just delaying the inevitable. Here’s when upgrading makes more sense:
- Your mower is older and showing multiple issues (not just battery)
- Repairs are stacking up—battery, sensors, wheels, electronics
- The model feels outdated compared to newer options
- Total repair cost starts approaching a significant portion of a new unit
6. Conclusion
Robot mower batteries don’t fail overnight—they fade gradually, shaped by how you use, charge, and care for them. For most homeowners, the reality is simple: expect about 3–5 years of reliable performance.
By recognizing early warning signs, maintaining smart mowing schedules, and avoiding extreme charging or storage conditions, you can stretch that lifespan significantly. When the time finally comes, remember: battery replacement isn’t a setback—it’s part of the ownership cycle.
In most cases, it’s a cost-effective way to restore your mower’s performance and reclaim that effortless, hands-free lawn care experience. Because at the end of the day, the goal isn’t just a working mower. It’s getting your weekends back.
FAQ
Q: How many years does a robot mower battery typically last?
A: Most lithium-ion batteries in robotic mowers last between 2 and 5 years. This lifespan depends on the number of charge cycles, typically ranging from 500 to 800, as well as lawn size, terrain difficulty, and local climate conditions.
Q: What are the early signs that my battery is failing?
A: The most common indicators include significantly shorter mowing sessions, more frequent trips back to the charging station, and the mower failing to complete the entire lawn in a single cycle. Consistent behavior changes are key indicators of degradation.
Q: Does temperature affect the lifespan of the battery?
A: Yes, extreme temperatures are detrimental. High heat accelerates chemical aging inside the cells, while charging in freezing conditions can cause permanent damage. It is recommended to keep charging stations in shaded areas and store batteries indoors during winter.
Q: Can I replace the robot mower battery myself?
A: In many consumer models, battery replacement is a straightforward DIY task involving opening the housing and swapping the pack. However, if the unit requires full disassembly or specialized waterproof sealing, professional assistance is advised to ensure long-term reliability.
Q: How can I make my robot mower battery last longer?
A: To maximize longevity, maintain a frequent mowing schedule to reduce motor load, keep the cutting blades sharp, and avoid deep discharges. Additionally, storing the mower in a frost-free environment during the off-season prevents unnecessary cell degradation.